Create an Unsupervised Classification Map in ENVI: Complete Step-by-Step Guide. Remote sensing technology allows us to observe, analyze, and understand Earth’s surface like never before. One essential task in remote sensing image analysis is land cover classification—dividing an image into meaningful categories like forest, urban, water, or agriculture.
ENVI (Environment for Visualizing Images) is among the most popular remote sensing software tools for this work. One of its simplest and fastest methods is unsupervised classification, which doesn’t need any prior training data.
In this detailed guide, you’ll learn step-by-step how to perform unsupervised classification in ENVI, explore the underlying concepts, best practices, and even pro tips for better results.
What Is Unsupervised Classification?
Unsupervised classification is a type of image classification that groups pixels with similar spectral characteristics into clusters or classes automatically, without any training data.
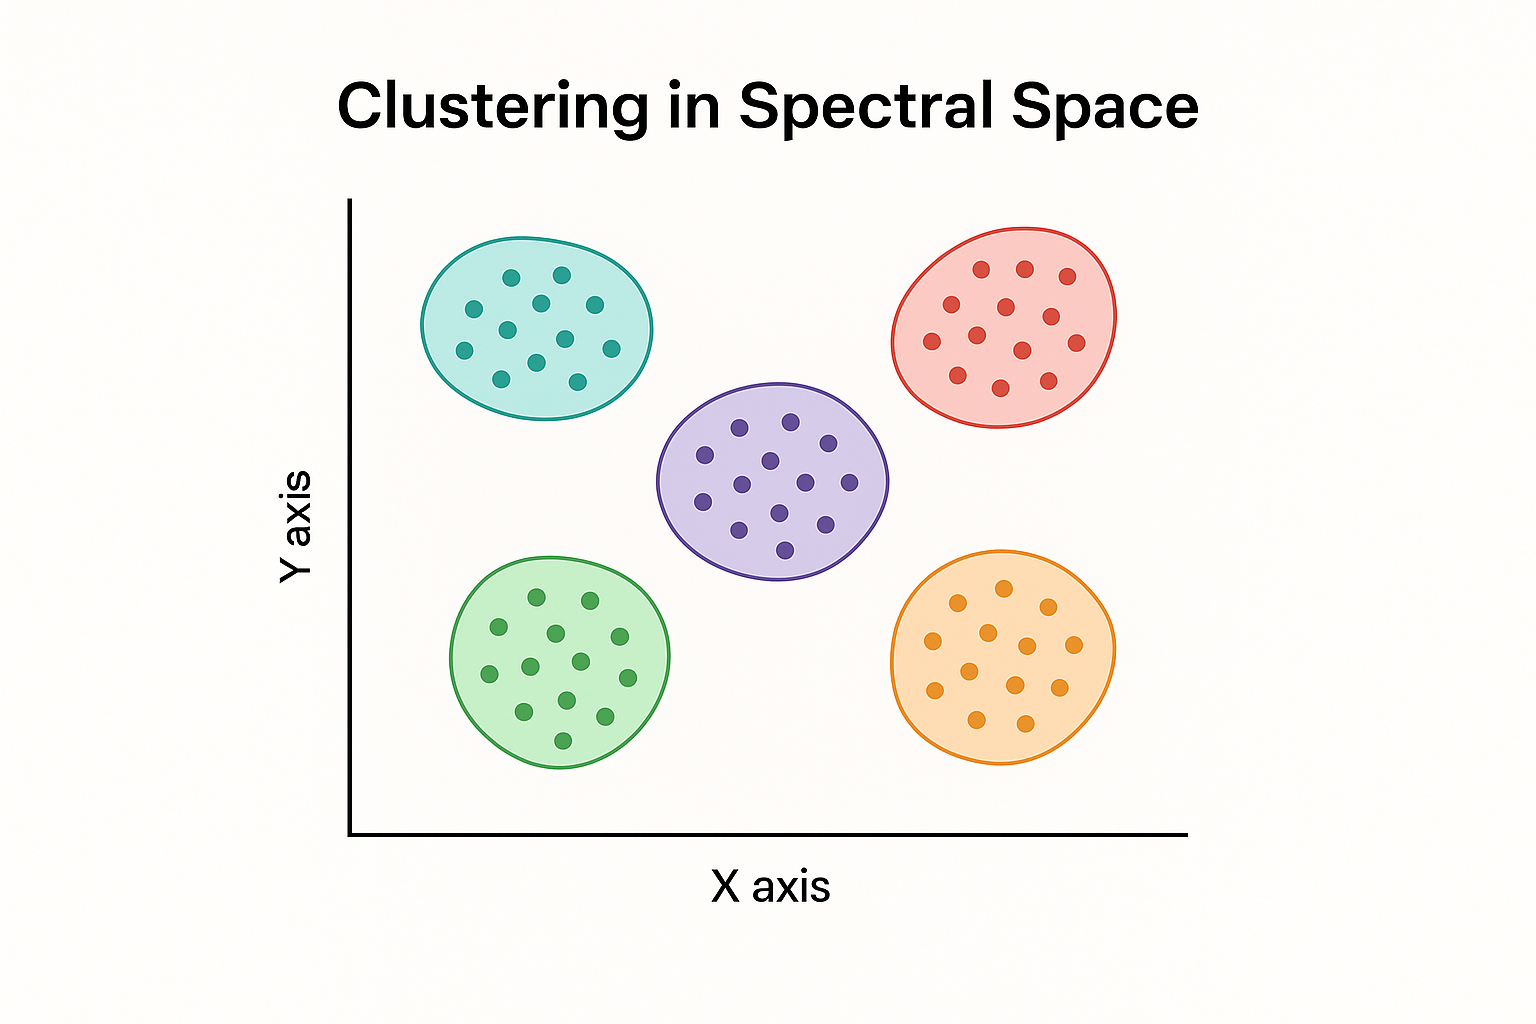
Unlike supervised classification, where you need to manually define training areas (known classes), unsupervised classification uses clustering algorithms to find natural groupings in the data.
Popular algorithms used in ENVI include:
-
ISODATA (Iterative Self-Organizing Data Analysis Technique Algorithm): Automatically splits and merges clusters based on user settings.
-
K-Means: Simple, fixed-cluster method that groups pixels into a specified number of classes.
Benefits of Unsupervised Classification
✅ Quick and easy to perform
✅ Requires no ground truth or training data
✅ Useful for exploring unknown or new areas
✅ Helps identify natural patterns in the landscape
✅ Ideal for creating initial maps for further refinement
Why Use ENVI for Image Classification?
ENVI is one of the most powerful and widely used remote sensing software packages. It supports hundreds of data formats, advanced visualization, and robust processing algorithms.
Advantages of ENVI for classification:
✅ User-friendly interface (classic and modern)
✅ Advanced clustering algorithms (ISODATA, K-Means)
✅ Interactive visualization and editing tools
✅ Integration with GIS formats and software
✅ Proven reliability for academic and professional projects
Prerequisites and Data Preparation
Before you start:
-
Ensure you have ENVI installed (Classic or Modern UI).
-
Have a georeferenced, multispectral image (e.g., Landsat, Sentinel, PlanetScope, aerial photo).
-
Check your image is pre-processed (e.g., radiometric correction, atmospheric correction) if needed for better results.
Step-by-Step Guide to Unsupervised Classification in ENVI
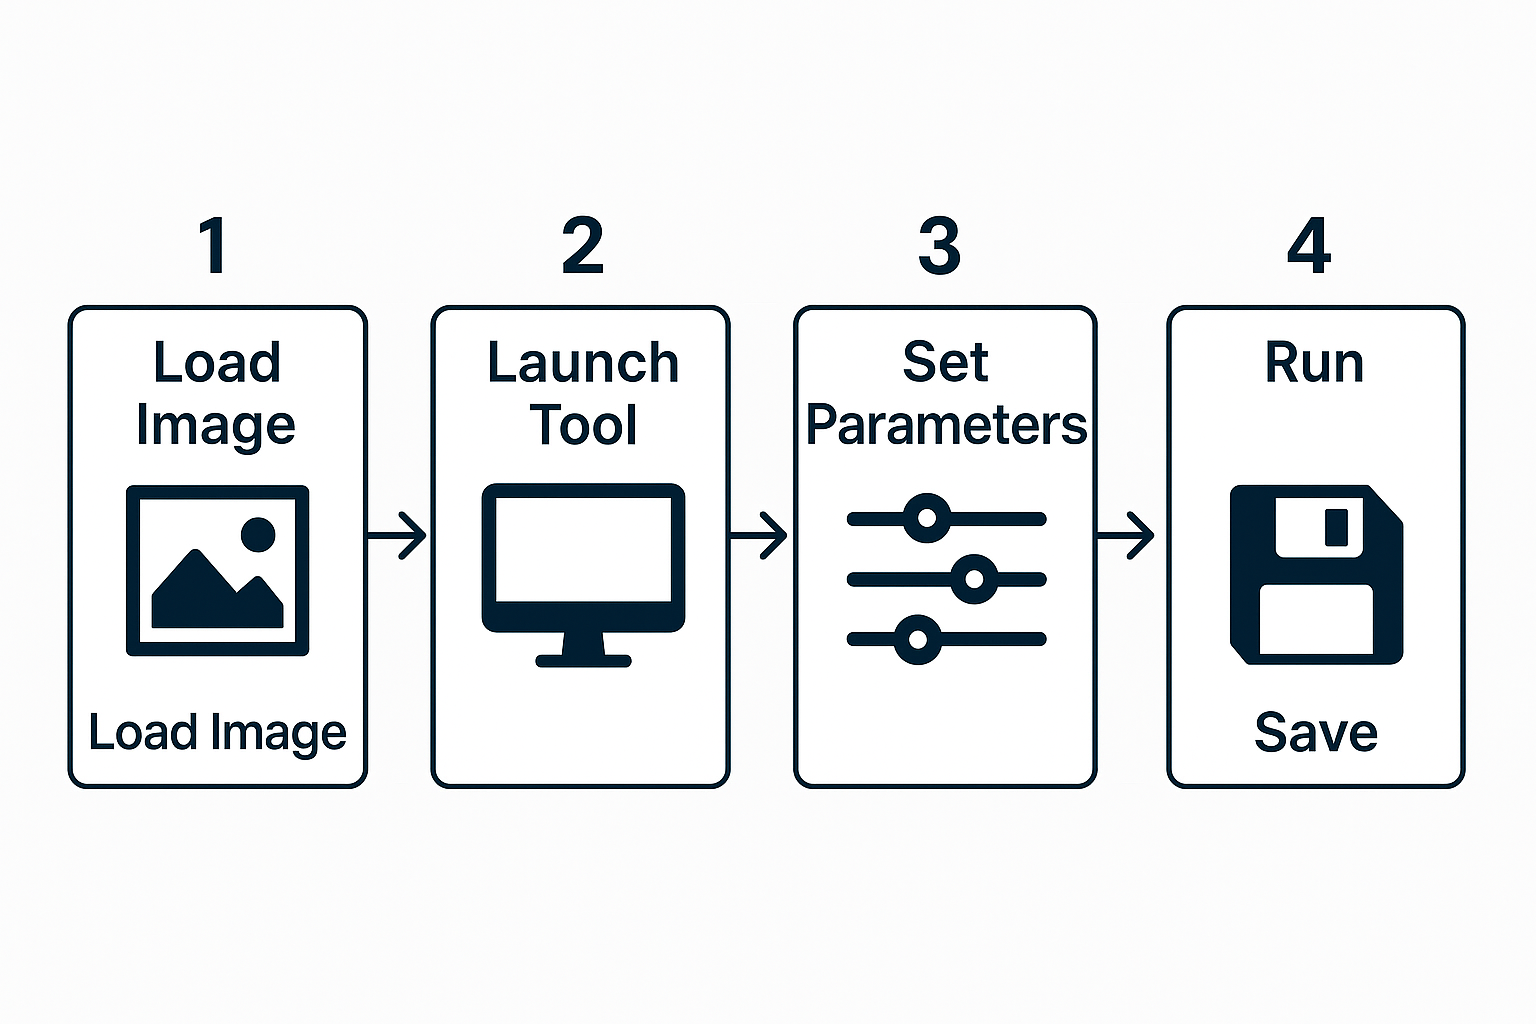 Let’s dive into the complete process:
1️⃣ Load Your Image
-
Launch ENVI.
-
Go to File > Open.
-
Navigate to your remote sensing image file (.tif, .img, etc.).
-
Click Open.
✅ The image will appear in the Layer Manager and Display window.
Pro Tip: Make sure to inspect your image’s bands. Some sensors have thermal or QA bands you may want to exclude before classification.
2️⃣ Start the Classification Tool
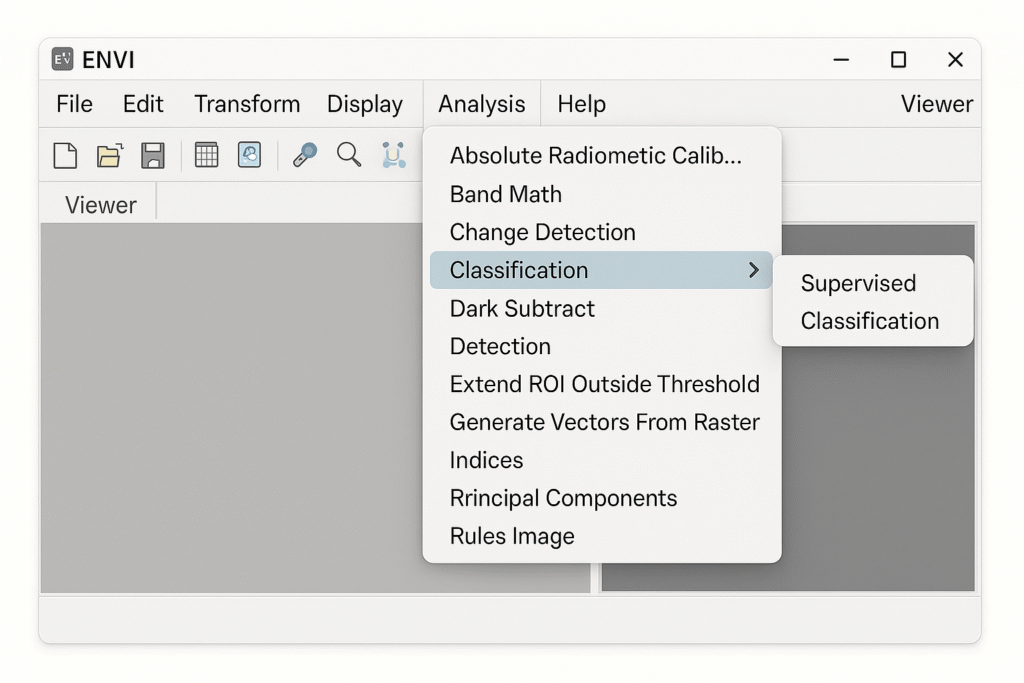 Depending on your ENVI version:
-
ENVI (modern interface):
-
Go to Analysis > Classification > Unsupervised.
-
Or open the Toolbox and search for “Unsupervised Classification.”
-
-
ENVI Classic:
-
Click Classification > Unsupervised Classification from the main menu.
-
✅ A dialog will open for configuring your classification.
3️⃣ Set Your Classification Parameters
You’ll need to choose:
-
Input Raster (your image)
-
Algorithm: ISODATA or K-Means
-
Number of Classes: e.g., 5, 10, 20. More classes mean more detail.
-
Max Iterations: usually 10–20.
-
Convergence Threshold: e.g., 0.95 for ISODATA.
Example typical settings:
✅ Algorithm: ISODATA
✅ Number of classes: 10
✅ Max iterations: 10
✅ Convergence threshold: 0.95
Explanation:
-
ISODATA will automatically split or merge clusters during iteration, producing more natural class boundaries.
-
K-Means simply partitions data into the fixed number of classes you choose.
4️⃣ Run the Classification
-
Click OK or Run.
-
ENVI will process the image, analyzing spectral similarities and assigning each pixel to a class.
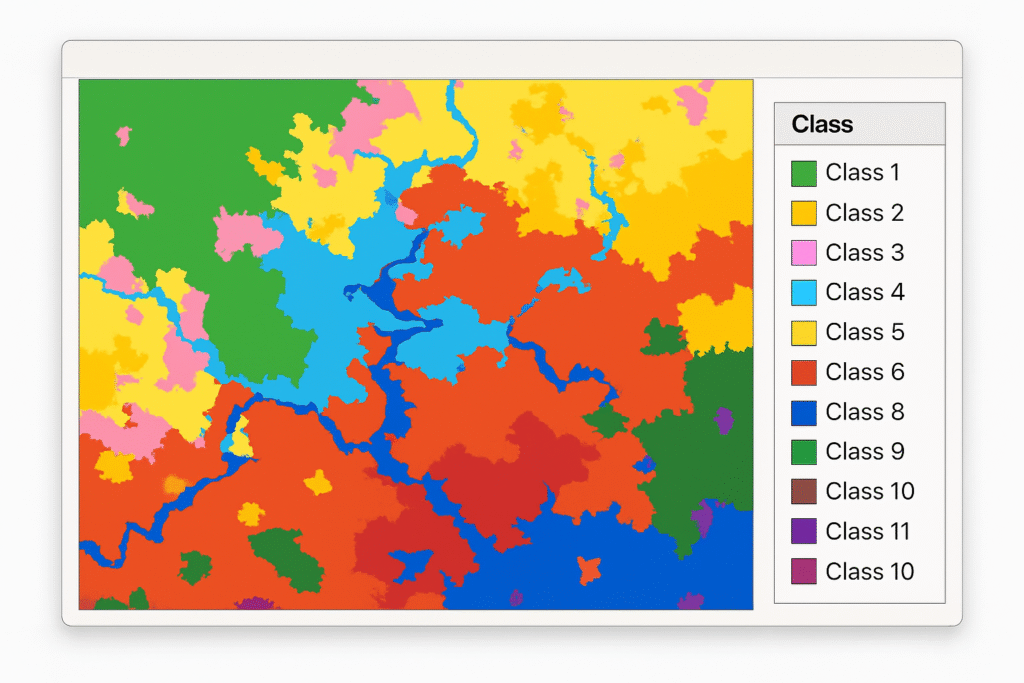
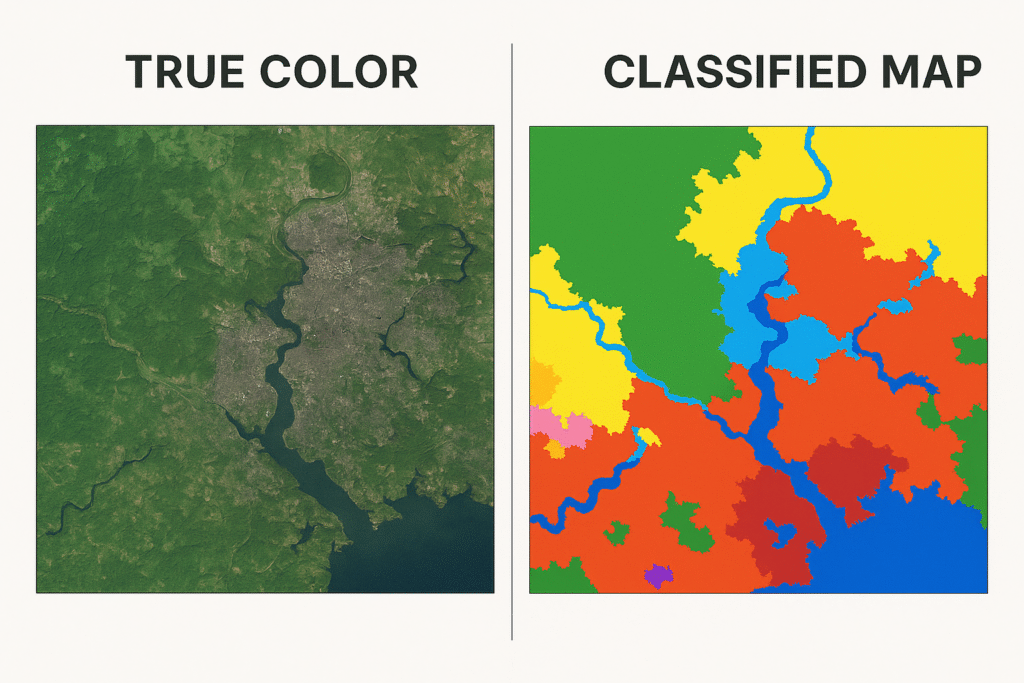
✅ The classified image will automatically display in the viewer.
What You’ll See:
-
Each class will have a unique color.
-
The map represents clustered land cover types (e.g., vegetation, urban, water).
5️⃣ Save and Export the Results
-
In the Layer Manager, right-click your classification result.
-
Choose Save As.
-
Select output location and format (e.g., GeoTIFF, .img).
✅ Save the legend or class color table if needed.
Pro Tip: Export your classification for further analysis in GIS software (e.g., QGIS, ArcGIS).
Read Also:
How to Use QGIS for Precision Farming: A Beginner’s Guide
Top 10 GIS-Based Dissertation Topics for Agricultural Students
GIS Software Development: A Complete Roadmap for 2025
Tips for Improving Your Classification
🔹 Pre-process your image: Atmospheric correction or radiometric calibration improves spectral separation.
🔹 Exclude non-informative bands: Omit clouds, shadows, or QA bands before running classification.
🔹 Test different class numbers: More classes = finer detail, but can also mean more confusion.
🔹 Merge similar classes: After classification, you can manually combine similar classes for cleaner maps.
🔹 Use band combinations: Create indices (NDVI, NDWI) and stack them with original bands to improve clustering.
🔹 Mask out areas: Use masks to exclude irrelevant regions like oceans or clouds.
Common Use Cases for Unsupervised Classification in ENVI
-
Land cover mapping in new regions
-
Change detection over time
-
Forest/non-forest mapping
-
Identifying urban expansion
-
Water body extraction
-
Preliminary mapping before supervised classification
✅ Conclusion
Unsupervised classification in ENVI is a fast, effective, and accessible way to turn satellite imagery into useful thematic maps. Whether you’re a student, researcher, or professional, this technique offers a quick first look at the land cover patterns in your study area.
By following the steps in this guide, you’ll be able to load your imagery, run clustering algorithms, and produce your own classification maps in minutes.
If you’re serious about remote sensing, unsupervised classification is an essential skill—easy to learn, and incredibly useful.
✅ Frequently Asked Questions (FAQs)
Q1. Which algorithm is better, ISODATA or K-Means?
-
ISODATA is often preferred because it can split/merge classes automatically, giving more natural results. K-Means is simpler but less flexible.
Q2. How many classes should I choose?
-
Depends on your goal. For broad land cover: 5–10 classes. For detailed studies: 15–20+. Experiment to find the best balance.
Q3. Can I edit the classification after it runs?
-
Yes! ENVI lets you merge classes, change colors, and export maps for further editing in GIS.
Q4. Do I need training data?
-
No. That’s the advantage of unsupervised classification—it works without any prior ground truth.
Q5. Is unsupervised classification accurate?
-
It’s good for exploratory analysis and unknown areas. For detailed, reliable maps, supervised classification with ground truth is usually better.
1 thought on “How to Create an Unsupervised Classification Map in ENVI: Complete Step-by-Step Guide 2025”